PAYROLL
Warning on local of payroll
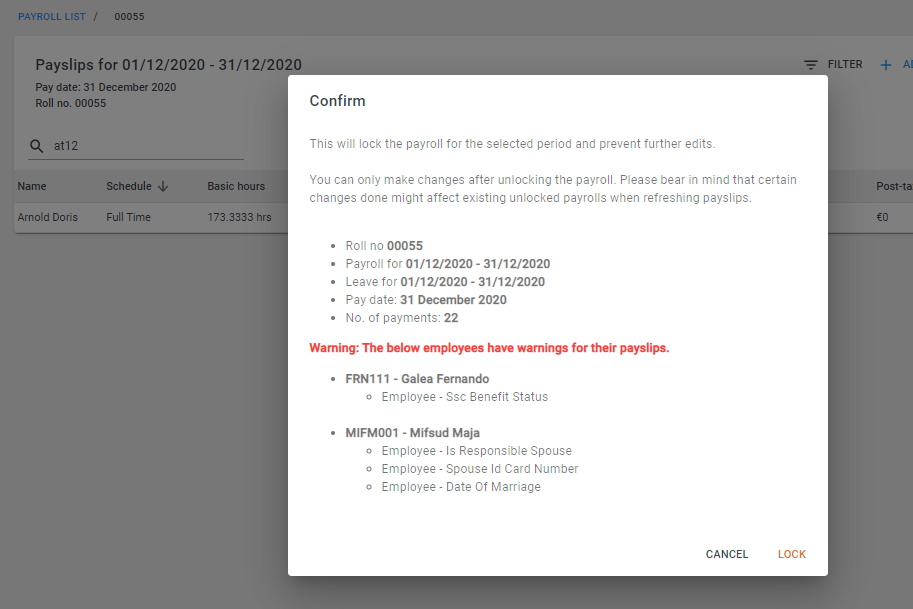
After you have finalised payroll and click the Lock button, you will get a dialog which includes the following:
- Payroll period
- Pay date
- Payroll roll number
- Number of payments within the payroll roll
- Payroll errors
- This is errors within the payroll that are preventing the calculation of an employee to be done. Such errors need to be resolved in order to finalise payroll.
- Payslip change warnings
- These are warnings related to changes that were done on the profiles or leave of employees within the payroll but such changes haven’t been reflected in the payslip calculator within this payroll. You may choose to ignore these warnings if you do not want these new updates to actually be reflected in this particular payroll calculation.
When creating a payroll roll, you may choose the leave date period that would determine which leave requests should fall within this payroll period.
You can specify these dates by clicking the blue “Specify Leave Period” toggle button. You will be able to modify these dates at any time as long as the payroll is unlocked, by going to the payroll list and clicking the Edit button (pencil icon).
If no leave period dates are selected, by default the leave period dates will be the payroll period dates.
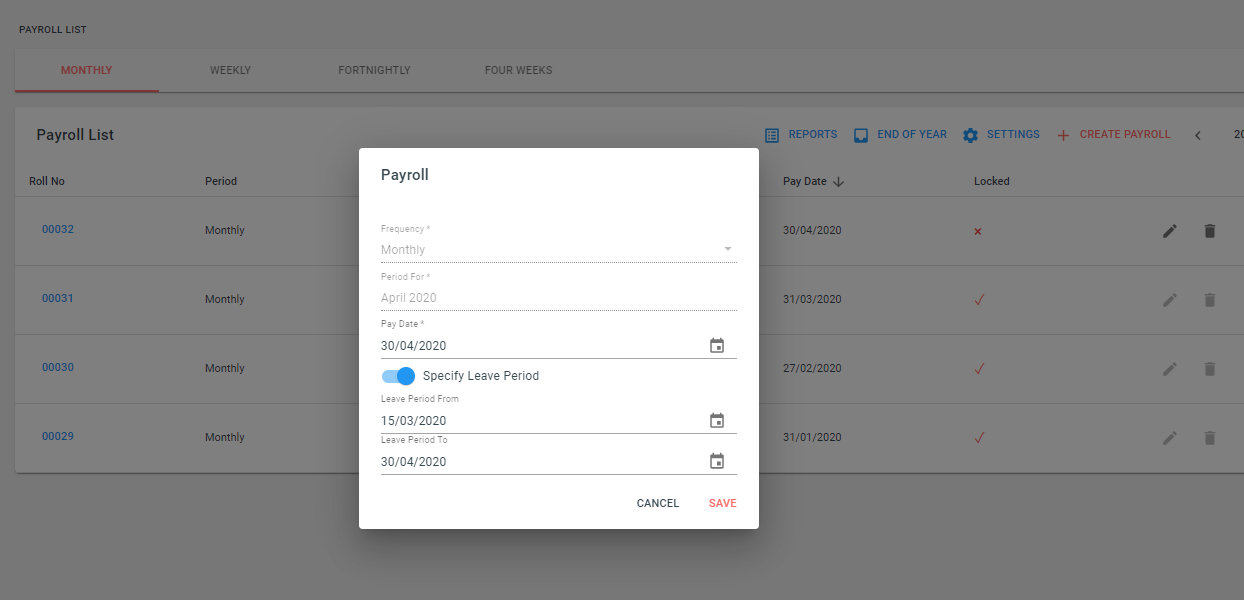
If you do select the leave period, a note will be automatically added to each payslip in the following format: “Includes leave for dates between {date} and {date}”. You may edit the note through the Add Employee button within the payroll roll.
When the leave period is selected, the leave that is then added to that month’s payroll will only be that which falls within the leave period dates and not the payroll period dates.
Example:
Payroll period dates: 01/01/2020 - 31/01/2020
Leave period dates: 15/12/2019 - 15/01/2020
Any leave booked after 15/01/2020 will not be considered for this payroll even though it falls within the payroll period.
Bulk uploads - Basic Hours
You can upload Basic hours in bulk by filling out the Bulk upload template. A template is to be downloaded for every client and payroll to which you would like to upload your basic hours to. This is because the template itself would automatically include the payroll number and a list of employees added to the payroll.
Please note that the employees need to be first added to the payroll in order to download the template.
To download the template:
- Go to the relevant payroll
- Click on Edit
- Choose Bulk Edit from the drop down menu
- Go to the Calculations tab
- Click the blue Bulk Upload button
- Click Download Template
Within the template you will notice that that there are 3 tabs:
- BasicHours
- PayrollNo
- EmployeeCode
You will need to fill out the first tab only, by picking the relevant information from the drop downs provided within the template.
To upload the template:
Once filled in, you may upload the template:
- Go to the relevant payroll
- Click on Edit
- Choose Bulk Edit from the drop down menu
- Go to the Calculations tab
- Click the blue Bulk Upload button
- Click Upload Basic Hours
All the information within the template will now be shown in the pop Edit pop up, Calculations tab. Please click Save to confirm the details and upload the date to payslip calculations.
You may re-upload the same file more than once. Please note that re-uploading the same file with the same employees but different Basic Hours, will be overriding any existing data for the same employee.
In the case of married employees who therefore have more than one payslip within a given month, the employee code will show twice including the relevant dates pre and post marriage date. Please select the right employee code to assign the basic hours to.
Bulk uploads - Overtime and Special rate
You can upload Overtime and Special Rate Hours in bulk by filling out the Bulk upload template. A template is to be downloaded for every client and payroll to which you would like to upload your hours to. This is because the template itself would automatically include the payroll number and a list of employees added to the payroll.
Please note that the employees need to be first added to the payroll in order to download the template.
To download the template:
- Go to the relevant payroll
- Click on Edit
- Choose Bulk Edit from the drop down menu
- Go to the Special rates & Overtime tab
- Click the blue Bulk Upload button
- Click Download Template
Within the template you will notice that that there are 4 tabs:
- AdditionalHours
- EmployeeCode
- SpecialRate
- PayRate
You will need to fill out the first tab only, by picking the relevant information from the drop downs provided within the template.
To fill out the template:
- PayrollStart - this is the payroll period start date of the payroll roll that this information will be uploaded to
- PayrollEnd - this is the payroll period end date of the payroll roll that this information will be uploaded to
- Employee code - this is the employee that this information will be uploaded to
- Special Rate - Yes/No. If the hours are Overtime hours please choose NO. What is Special Rate? Read more here.
- PayRate - if Overtime, please select 100% 150% or 200%. If Special Rate, only 100% is applicable. If any other pay rate is added this will be ignored during upload
- DateWorked - add the dates relevant
- Hours - add the number of hours
- HourlyRate - by default, the hourly rate that is relevant to the Basic salary added to the position history of the employee, based on the date added in DateWorked will be used. If this is to be used then there is no need to add the hourly rate. If you’d like the employee to be paid at a different hourly rate, please specify. Rate will be allowed at two decimal places.
To upload the template:
Once filled in, you may upload the template:
- Go to the relevant payroll
- Click on Edit
- Choose Bulk Edit from the drop down menu
- Go to the Special rates & Overtime tab
- Click the blue Bulk Upload button
- Click Upload Additional Hours
All the information within the template will now be shown in the pop Edit pop up, Special rates & Overtime tab. Please click Save to confirm the details and upload the date to payslip calculations.
You may re-upload the same file more than once. Please note that re-uploading the same file with the same employees but different Basic Hours, will be overriding any existing data for the same employee.
In the case of married employees who therefore have more than one payslip within a given month, the special rate/overtime will show in the relevant payslip based on the date added in the “DateWorked” column in the template.
Injury Benefit Deduction
Injury benefit is automatically deducted from the 4th consecutive day of Injury leave booked. Read more on how it works here: https://support.talexio.com/hc/en-us/articles/360013146959-How-is-Injury-Benefit-Deduction-calculated-
LEAVE
Leave request notification email
When more than one person has the Approve Leave permission for an employee, a Unit or Global, you can set who is to receive the email notification.
To do so:
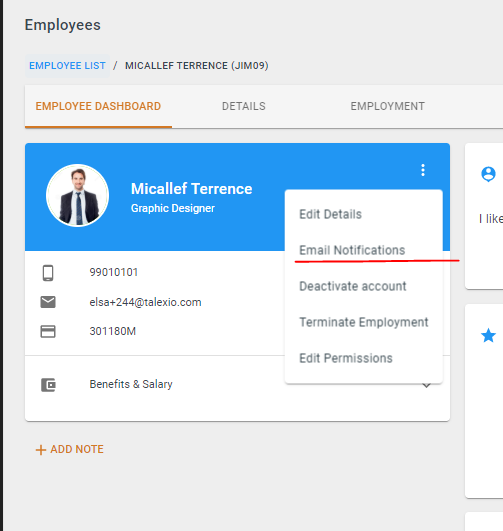
- Go to the profile of the employee who has Approve Leave permission
- Click the burger menu (three dots on the employee dashboard profile section)
- Click Email notifications
- Here you will see a list of Units and/or groups for who the employee in questions has Approve Leave permission
- Tick the relevant employees and/or Units for who this employee should get email notification regarding Leave requests
Note: The employee will still be able to approve leave of those employees/units that are unticked. We are simply setting which emails this employee should receive.